Gallery of past work

Tuesday 19 March 2019

Figures

I’ve been working with figures found in early 20th century photos in the Swindon Museum and Art Gallery archive for a new piece of work featuring people from the period.

This has entailed opening likely-looking photos in Photoshop Elements, such as this one of a group of  Great Western Railway committee members in the 1920s or 30s about to board a train from Swindon for a day out.


Here, I clicked on the Quick Selection tool, outlined each chosen figure (to achieve accuracy takes some patience), right clicked on the selected image, and chose Layer Via Copy from the pop up menu and then edited it. This created a copy of the image which could then be moved around, adapted, enlarged or minimised using the Move tool. It could then be saved in the usual way for later use. These groups of men and women resulted.


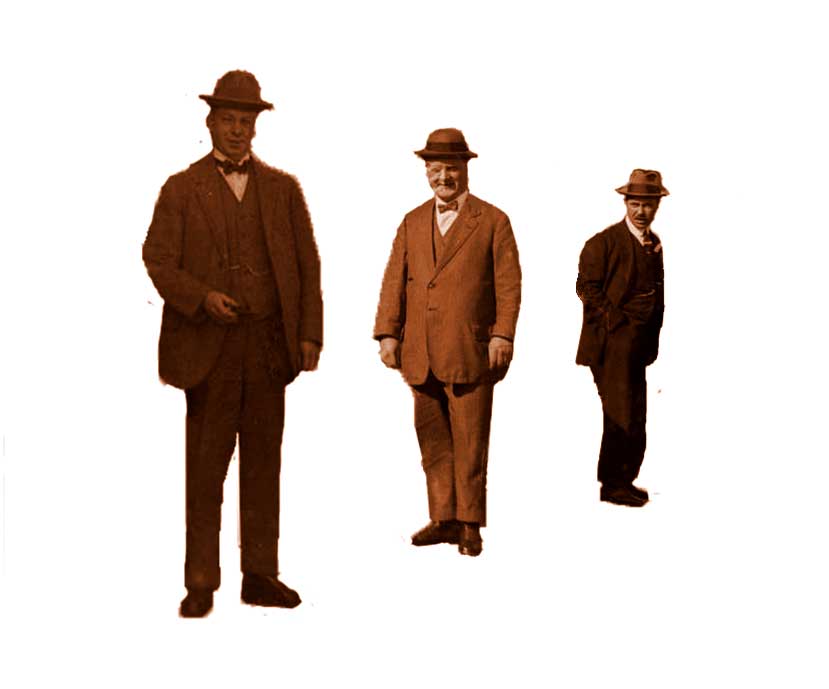
I am building up a library of such figures from various photos. Each figure has been saved on a separate layer so that it can be used easily in future work. 


Monday 11 March 2019

Layers for Stitch

For my latest series of work for exhibition at Swindon Museum and Art Gallery in May, I've been experimenting with stitch on two layers, ultimately to be laid one over the other in some way. This post is very much 'work in progress' and stitching is not yet complete.

I generated all the images below in Adobe Photoshop Elements and then printed them onto fabric using an Epson pigment ink printer. In each case, the under layer is printed on cotton and the top layer on organza to maaximise transparancy. I have stitched on both layers, sometimes one over the other and sometimes on different parts of the image. In each case, I've used a single thread of DMC floss to keep the stitch as light touch as possible.

First, stitching is shown on the top organza layer, here seen lying over paper without the underlying cotton layer to show the delicacy of the printed image and the stitch. Here I've used a simple running stitch but because of the transparancy of the organza, the threads on the back are visible as well as those on the front, giving a unique effect. 


The next images show stitching on the bottom cotton layer only. Here running stitch and a small stab stitch have been used to work over and integrate parts of the design (in the first image) and to delineate and embellish features (in the second).


I'm currently experimenting with different ways for overlaying the organza. Interesting effects seem to be generated by separating the two layers with spacers and even by off-setting them slightly. There is also the possibility of putting the organza layer over the reverse side of the cotton layer so that the sometimes quite complex stitch on the front can be seen clearly. Both sides would then be seen by the viewer.

The ultimate plan as I write is to show the work in acrylic / Perspex frames and I am currently researching possibilities.


Tuesday 5 March 2019

Final thought?

I've spent much time recently playing with the fourth starter image I previously posted here. After much consideration - minipulating colours and opacity and adding, duplicating, moving and removing layers (it was a long process), I've ended up with this.


At least, I think this could be a finishing point and a piece ready for stitching but I will need a time away from it to view it impartially before I can be sure. I find a time interval very helpful. Things need to settle in my mind before I can view things objectively, especially when they are as visually complex as this one. 

My main concern with it, as so often with my work, is the complexity of the image and the question of whether there is actually space for stitching and whether it will add anything or merely increase the sense of visual business. Printing out onto proofing paper will help as images often looks very different when the intense light and glimmer of the computer screen has gone. On the other hand, sometimes stitching in a fairly muted and harmonious colour can help to 'knock back' an image and unify it. Some experimentation will be needed!

This image has been built up over some time, with the various elements being added as the mood has taken me, so of course, it's always possible I may yet start again from scratch adding the elements one by one and see where it gets me. As each small element is added on a separate layer, I am able do this and it may help me solve the complexity problem if I feel I need to. 

The use of digital photo manipulation software sure throws up its own challenges!